¶ How to setup Outlook to access your May First email account
¶ Classic Outlook vs New Outlook
When using the new Outlook your emails, calendar events and contacts are automatically synced to the Microsoft Cloud, meaning they are uploaded to Microsoft's servers even if you are using a non-Microsoft email account provided by May First.
We recommend using classic Outlook to access your May First email account.
If you are not sure which version of Outlook you are running use this guide to determine which version of Outlook is installed.
In some cases you may have both installed and can toggle between new and classic mode. To launch the classic version search your Windows apps for Outlook (classic).
¶ Download classic Outlook
Newer versions of Windows may ship with only new Outlook by default.
To install a standalone version of classic Outlook for Windows, use this Download link or Install it from the Microsoft store and follow the prompts to complete the installation.
¶ Account Setup
Outlook's design is primarily oriented towards using it with Microsoft products. You can use Outlook's account setup wizard to do most of the configuration for your May First account but you'll need to make some corrections.
The first time you launch the Outlook (classic) app the account setup dialog window will open for you. You can also initiate the same process by creating a new account from the Account Settings dialog.
Click through all of the following numbered tabs to see the complete setup process with classic Outlook.
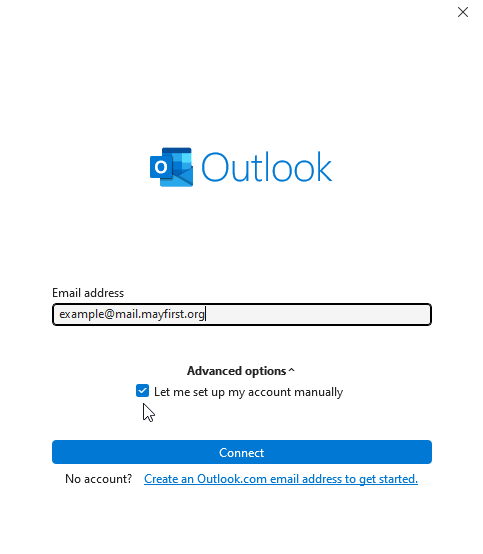
 Start by using your
 @mail.mayfirst.org address to configure Outlook so that it finds the correct May First server settings automatically. Even if your eventual goal is to configure another address like youraddress@yourowndomain.org start by using the May First account name you've configured that address to deliver to. You will be able to add additional addresses in a later step.
In the screenshot below example is our May First Mailbox account name. Substitute example with the name of your own May First account with Mailbox access.
Click the Advanced options arrow and check the Let me set up my account manually checkbox
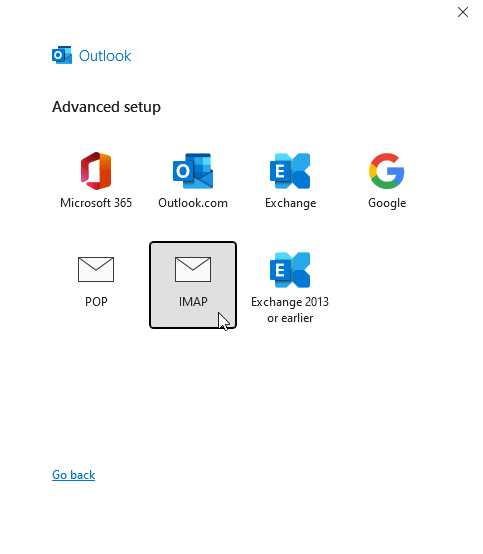
We recommend choosing IMAP for most scenarios.
You can also choose a POP3 type connection if you prefer however you cannot switch between POP3 and IMAP protocol setups without creating a new account configuration. Read more about the differences between IMAP and POP3 protocols.
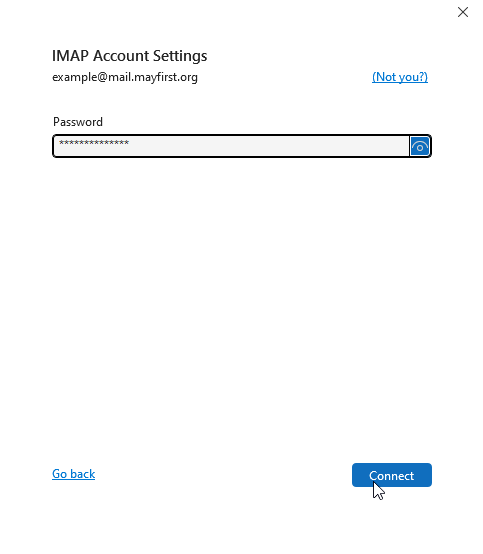
Enter the password for your May First mailbox user account.
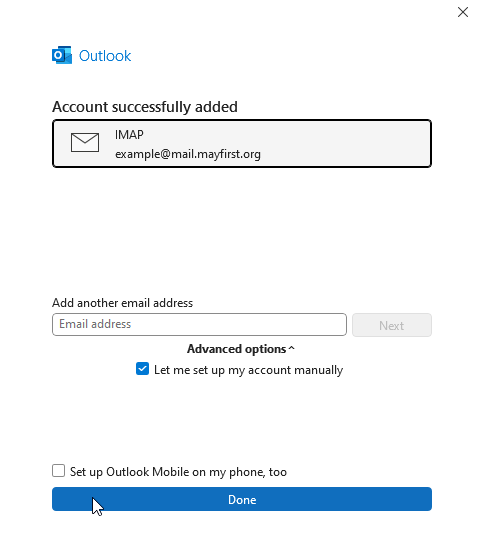
If the previous steps worked correctly you should now see a message that your account was successfully added. Additional adjustments need ot be made in the next steps. Skip setting up Outlook Mobile and click Done to close this window.
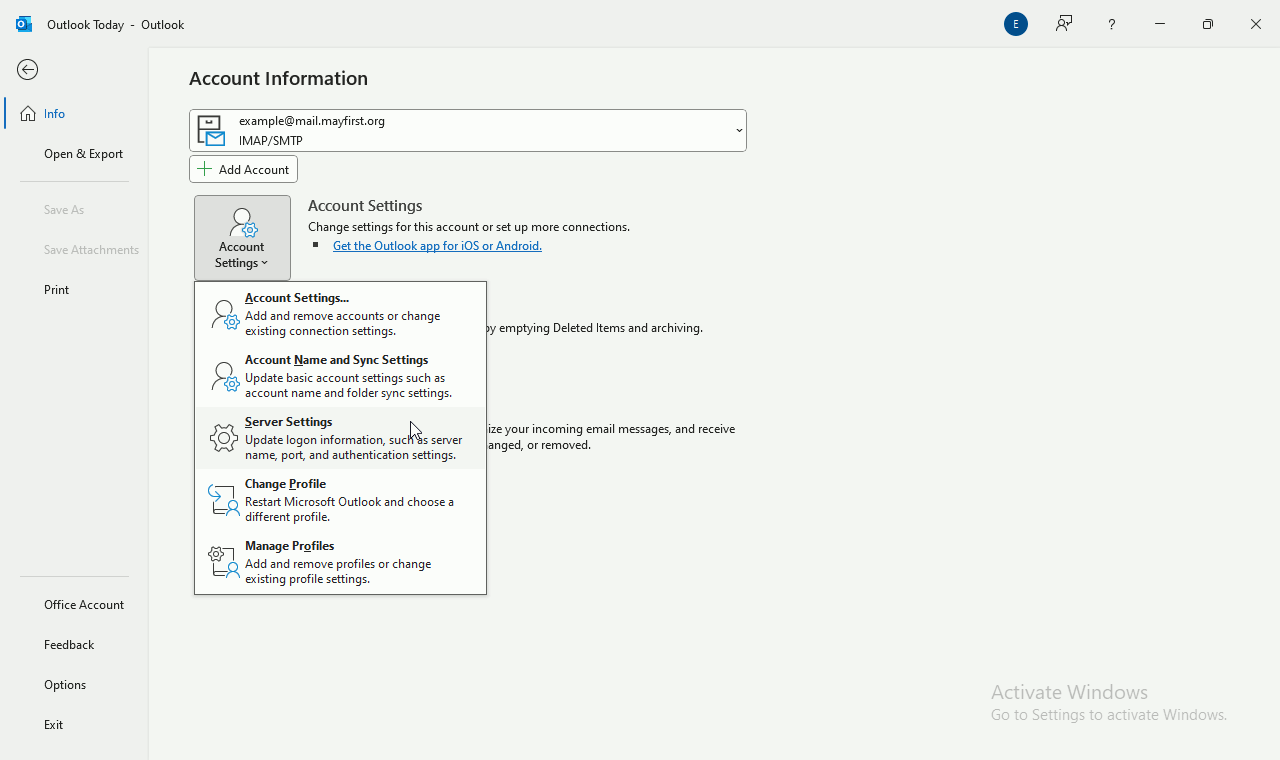
From the file menu access the Account Settings menu and select Server Settings.

In the Incoming mail options edit the username and make sure to leave only your mailbox username without the @ suffix.
Outlook should automatically choose SSL/TLS encryption and Port 993 which are both correct.
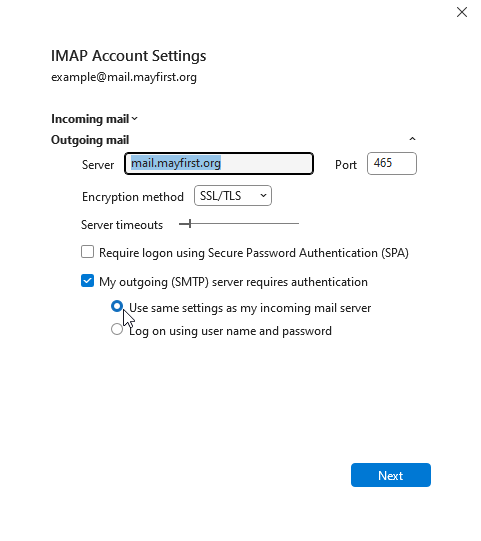
Sctoll down to the Outgoing mail options and choose Use same settings as my incoming mail server.
Outlook should automatically choose SSL/TLS encryption and Port 465 which are both correct.
Click Next to continue.
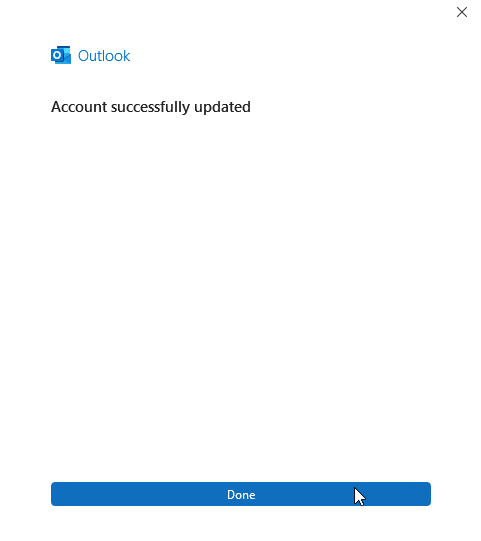
If the account was successfully created you can click Done and you are now ready to begin downloading and sending mails through May First servers.
In most cases you will also want to setup sending from other email addresses using this same account.
¶ Send from other email addresses
In the May First control panel you can configure one or more addresses of your own domain like youraddress@yourowndomain.org to deliver to a May First user mailbox. You can configure Outlook to use send email as those addresses in this step.
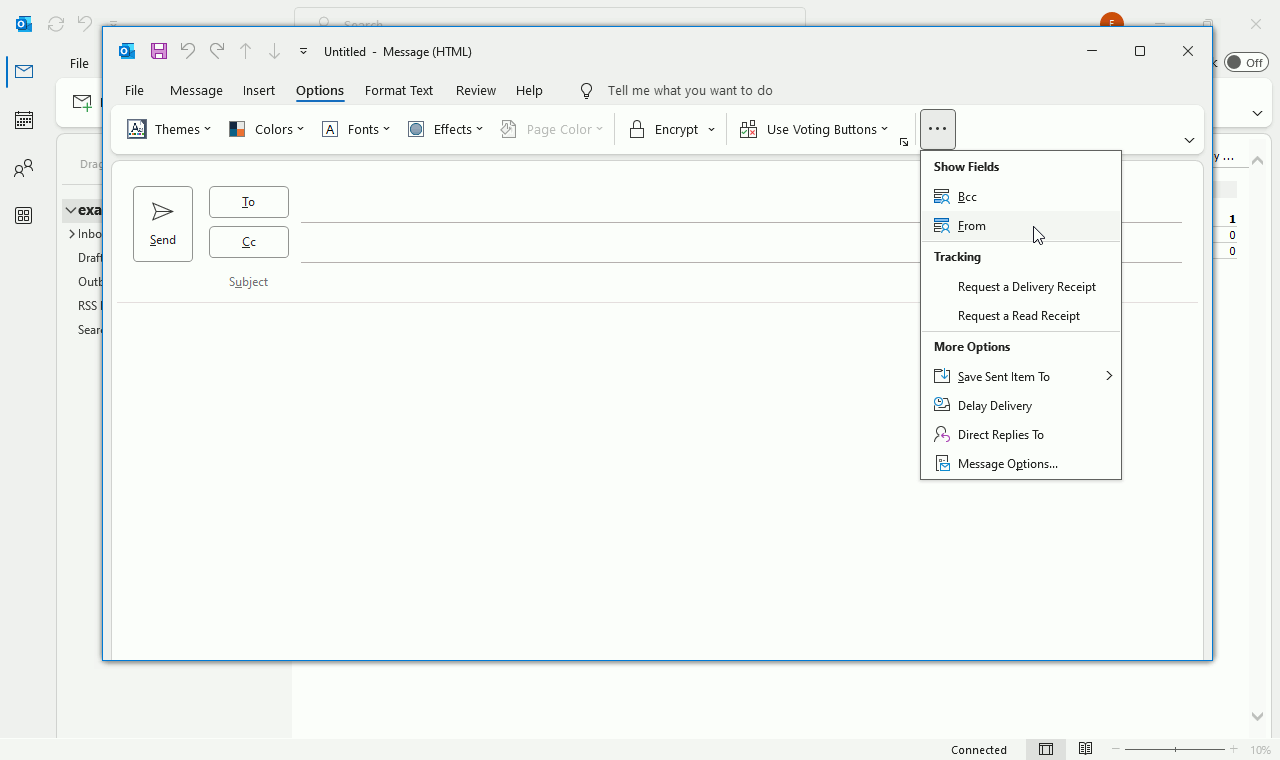
Create a new email message and select the Options menu . Then select the *** menu drop down and under the Show Fields label click the From to make the From field visible which will display the sending address.
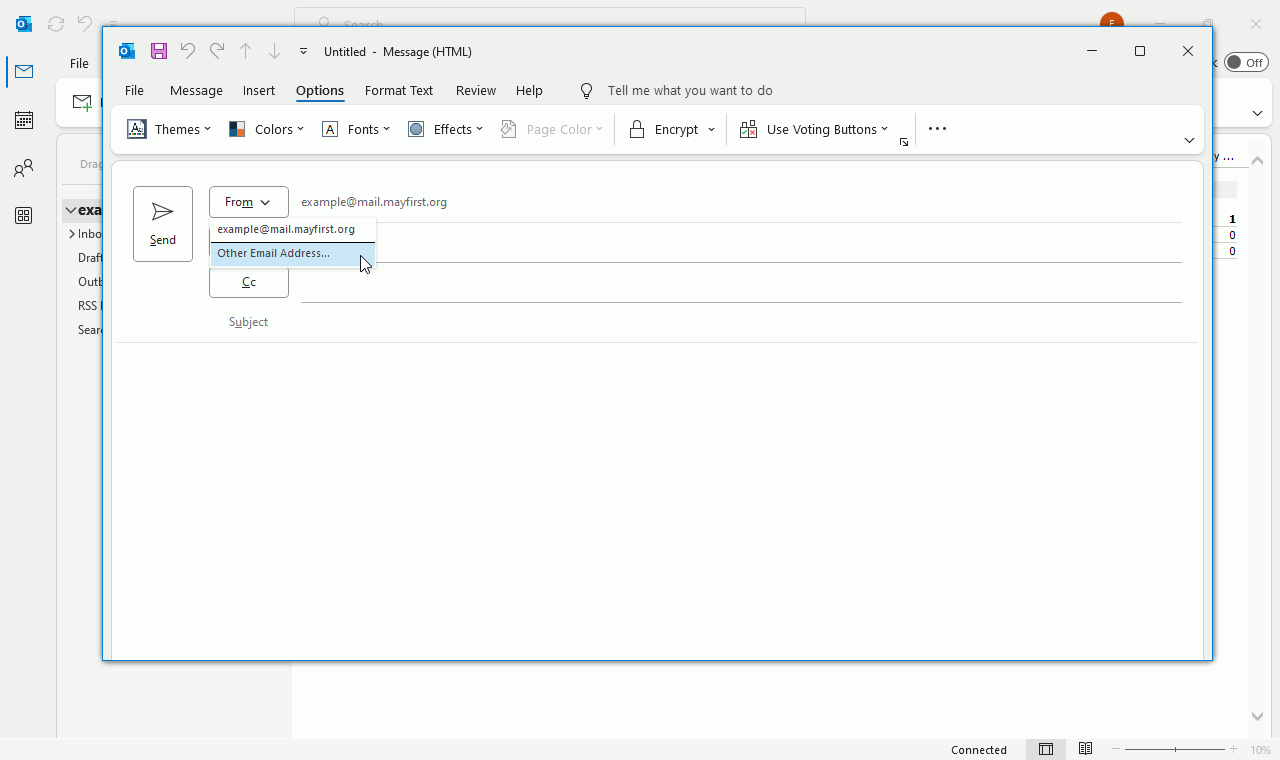
Click the From field triangle and choose the Other email address option
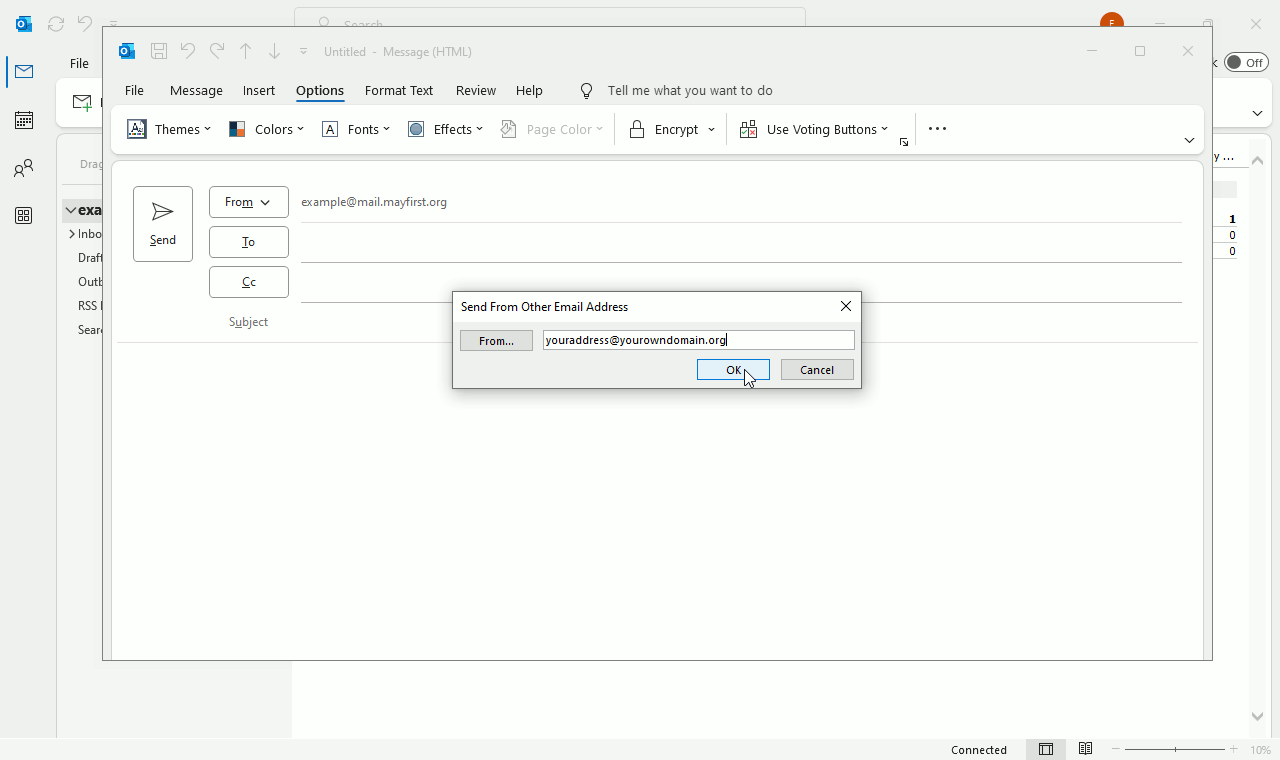
Enter the alternative address you would like to send from. This should be an email address that you have aleady configured in the May First control panel to deliver to the @mail.mayfirst.org mailbox you have configured in Outlook.
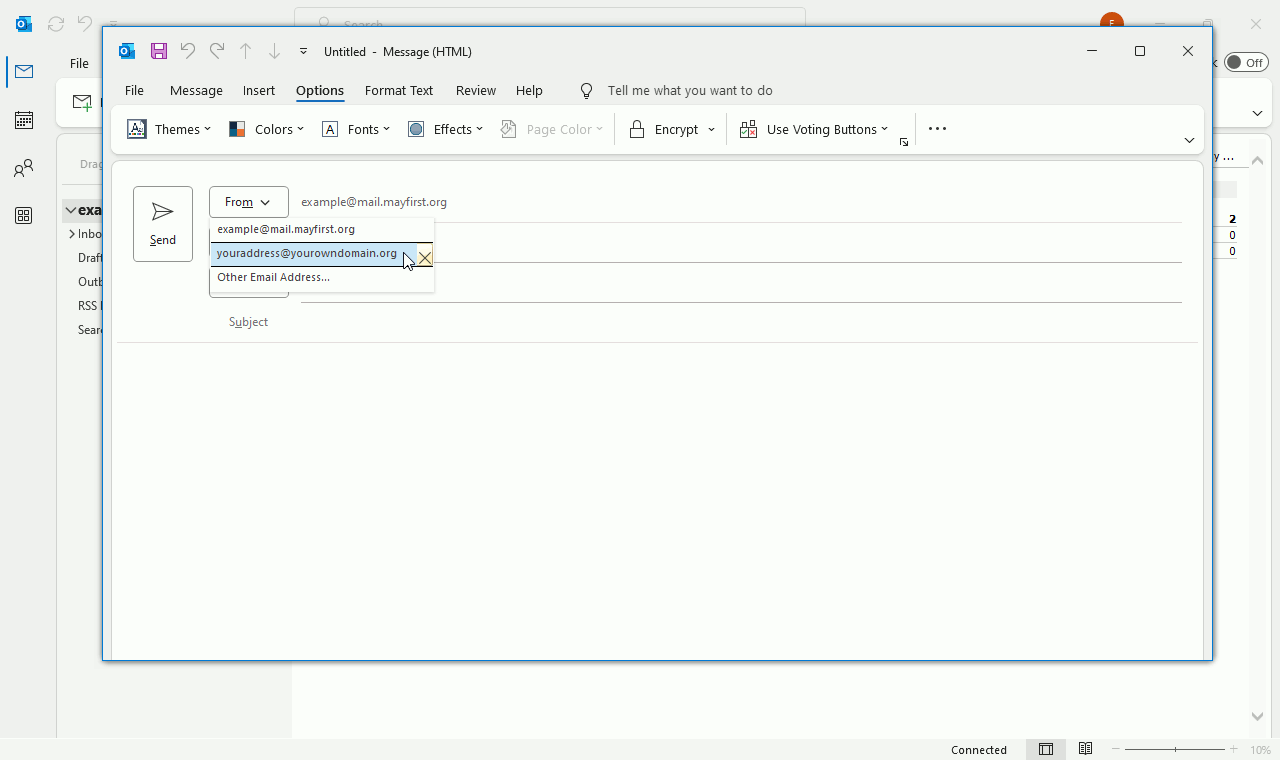
Microsoft refers to any additional email addresses used to send and receive mail through the same account as email aliases for its own email service products but doesn't explicitly call them that within Outlook. They will simply appear as additional addresses you can choose to send from when composing a new email.
Outlook does not allow you to make the new address the default so you will have to manually select the correct address every time you are sending a new email.